The first thing I noticed about my new MakerFarm prusa i3 was that the NEMA 17 extruder stepper motor was getting very hot. So I ordered a 40mm x 40mm heatsink and 40mm x 40mm x 10mm 12V fan from Amazon.com. When I attempted to install the heatsink and fan I realized I needed much longer machine screws. They needed to be 25mm longer then the stock NEMA 17 screw. So I started looking for m3 75mm screws. McMaster Carr only went up to 60mm, Fastenal did not carry them either. The only place I could find the proper length screw was a German R/C car site that looked a little out dated. I could not believe the screws were so hard to find. One day I was telling my father this dilemma and said “why don’t you just make them from threaded rod?”. Damn good idea Dad!
I ordered a m3 threaded rod from McMaster Carr. Threaded on some nuts then cut it into 72mm lengths.
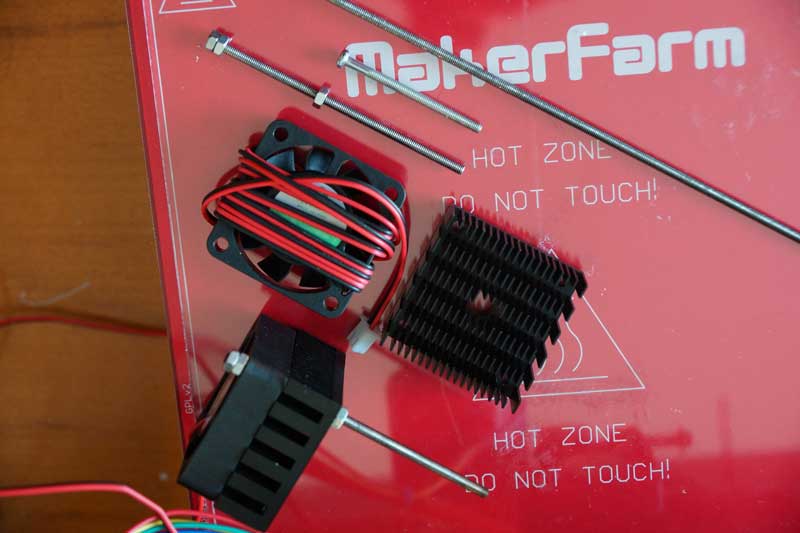
Then I threaded 2 of the rods into the extruder stepper motor. A nut was used to tighten up against the motor.
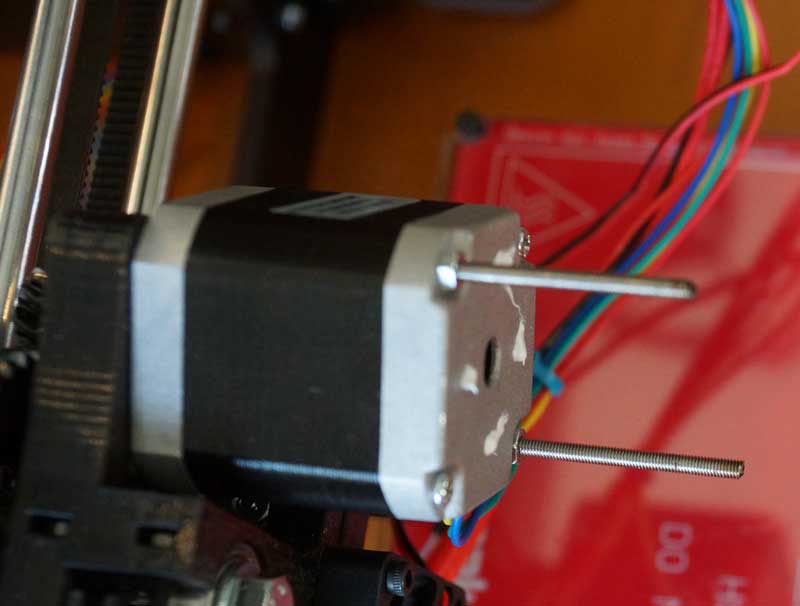
Now with the studs extended I put on some heatsink compound then slid on the heatsink and fan a washer and lock nut.
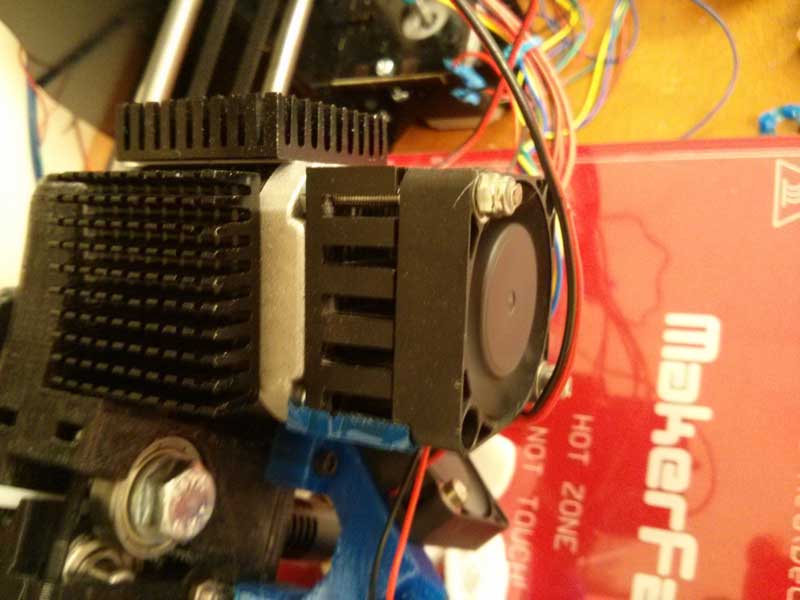
You may notice I went heatsink crazy and added some passive heatsinks to the three exposed sides of the stepper. All I can say is that my extruder stepper runs nice and cool now.
What exact threaded rod did you use from McMaster ? Can you post a link?
Thanks!
Metric 18-8 Stainless Steel Threaded Rod, M3 Size, 1-Meter Length, 0.50 mm Pitch
McMaster part # 90024A040
Thanks!
What did you use to adhere the heatsink to the stepper?
I used heat sink tape http://amzn.to/2C1kCRj
Thank you for sharing. Iʻve incorporated your cooling mod into my Witbox. It is very clever and effective.
https://imgur.com/8C8hZTW
Brian, Nice clean setup you have there. I am sure the cooling is a big help.
Thank you. Iʻm glad I found your solution. It was one of the few improvements that made it possible or me to print over 6 hours without a stall or thermal shut down. Here are the other improvements, in case youʻre interested.
https://imgur.com/a/fgfbR
Iʻm left wondering, why couldnʻt an out of the box, expensive assembled printer come along with this cooling as standard equipment in the first place. Iʻm assuming engineers would think something like this would be necessary. At any rate, I feel empowered enough to improve things on my own -now. Thanks again for sharing your knowledge. Iʻm grateful.